
How to Choose Lifting Accessories That Don’t Slow Down the Job (or Create Risk)
A practical guide for Sydney industrial, warehousing, and maintenance teams on choosing lifting accessories that suit real lift conditions—not just WLL. It covers common selection mistakes, the decision factors that reduce delays and risk, and a simple 7–14 day plan to standardise kits, tighten inspection/storage, and stop risky substitutions.
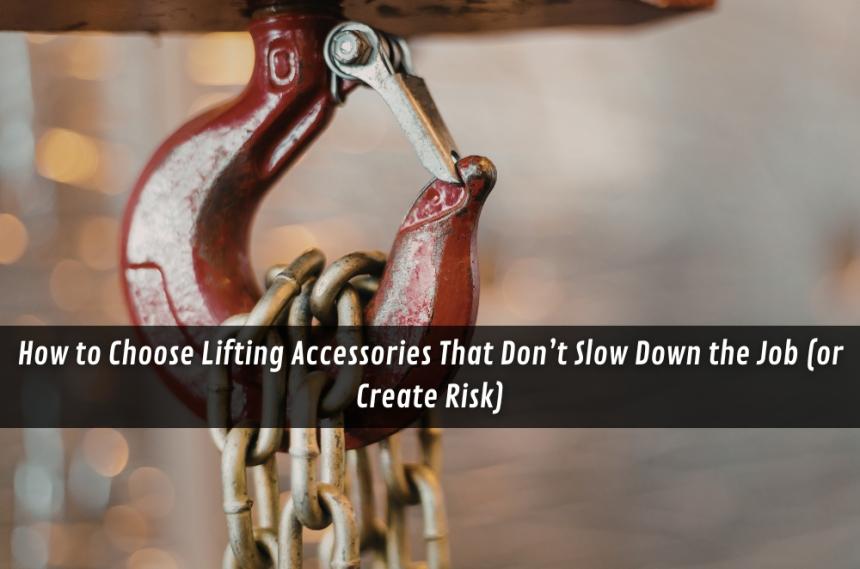
Lifting accessories sit in an awkward spot on many sites: they’re essential, used daily, and often treated like “basic consumables” until something goes wrong.
The goal isn’t to memorise every hardware type or become a rigging specialist overnight.
It’s to make sure the accessories on hand match the loads, the lifting points, and the way work actually happens—so lifts are smoother, inspections are simpler, and procurement isn’t scrambling mid-job.
What “lifting accessories” covers in real workplaces
In most industrial environments, lifting accessory products for industry isn’t one thing—it’s the collection of items that connect the load to the lifting device and control how the load is supported.
Common categories include:
- Connectors and links: shackles, hooks, master links, connecting links, and couplers that form the “chain” between the lifting device and the load.
- Slings and flexible supports: webbing slings, round slings, wire rope slings, and chain slings, chosen based on the load, edges, temperature, and handling needs.
- Load attachment points: lifting points, eye bolts, swivelling hoist rings, plate clamps, and other interfaces designed to attach to the load safely.
- Protection and control items: edge protection, sleeves, corner protectors, tag lines, and other add-ons that reduce damage or improve control.
- Hardware that looks similar but behaves differently: items with different grades, different pin types, different latch arrangements, or different intended uses.
Two accessories can look nearly identical on a workbench yet perform very differently when the angle changes, the load shifts, or the surface is sharp.
That “close enough” moment is where delays, damage, and risk typically begin.
Common mistakes that cause rework, delays, or near-misses
Most lifting accessory issues aren’t dramatic failures.
They’re small selection or process errors that compound: wrong gear turns up, the lift plan changes, a supervisor improvises, and suddenly the job is slow and messy.
Here are the patterns that show up repeatedly.
Treating WLL like the only decision factor.
Working Load Limit is important, but it’s not a magic number that ignores sling angles, attachment geometry, dynamic loading, or the condition of the gear.
Mixing “similar” hardware without controlling grade and compatibility.
A shackle is not “just a shackle” when pin type, bow size, grade, and markings vary across stock.
Using the wrong attachment for the lifting point on the load.
If the load’s lifting points are poorly positioned or not rated for the intended direction of pull, the best sling in the world won’t fix it.
Ignoring edges, temperature, and surface conditions.
Sharp edges and abrasion can turn a good sling into a bad choice fast, and hot work areas can rule out certain materials.
Letting procurement substitute items without technical sign-off.
When a planned accessory isn’t available, a “near equivalent” can sneak in and become the new normal.
Not standardising inspection and tagging routines.
If inspection frequency, rejection criteria, and storage are inconsistent, the site ends up with a mixed pool of unknowns.
Storing accessories in a way that damages them.
Slings thrown in a bin with sharp hardware, wet storage, UV exposure, or chemical contact can shorten life and increase uncertainty.
If any of these feel familiar, the fix isn’t “buy better gear”.
It’s building a selection method that matches the way people work under time pressure.
Decision factors that actually matter when selecting accessories
A sensible selection framework usually wins over “what we used last time”.
In practice, a few decision factors do most of the heavy lifting.
1) The load and how it will behave
Start with the load’s actual characteristics, not the nominal weight on a drawing.
Consider:
- Where the centre of gravity is likely to sit
- Whether the load can shift internally (liquids, moving parts, flexible frames)
- Whether it’s fragile, painted, or easily marked
- Whether it has engineered lifting points—or improvised ones
If the load can tilt or roll, the accessory choice needs to anticipate that behaviour, not react to it.
2) The lifting points and direction of pull
Many issues come from a mismatch between the accessory and the lifting point.
Things to check:
- Are lifting points rated and positioned for the intended lift?
- Will the pull be straight, angled, or potentially side-loaded?
- Is there enough clearance for the connector to sit correctly without binding?
- Is the connection likely to rotate during the lift?
Side-loading, binding, and poor seating are common sources of gear damage and near-misses.
3) Sling angles and rigging geometry
Rigging geometry can change what looks like a comfortable lift into a borderline one.
A small change in angle can change the forces in the legs and the load on connectors.
The practical takeaway: if the lift geometry isn’t stable, the accessory selection shouldn’t be either.
4) Environmental constraints and work conditions
Ask what the jobsite does to the gear:
- Sharp edges and abrasive contact
- Heat, weld spatter, or hot surfaces
- Chemicals, corrosion risks, wet storage
- Outdoor UV exposure
- Tight spaces where connectors may bind or twist
This is often where the “best” accessory on paper becomes the wrong one on the day.
5) Inspection, traceability, and lifecycle management
Accessories are only as reliable as the system around them.
In most cases, a slightly less “perfect” accessory that is properly tracked, stored, and inspected beats a premium option that no one can verify on site.
So build selection around:
- Clear identification and markings
- Consistent tagging/traceability
- Rejection criteria that people actually follow
- Storage that protects slings and hardware
- A process for quarantining suspect gear
6) Site standardisation and availability
If the accessory is rarely available when needed, teams will improvise.
Standardising a smaller set of common configurations often reduces variation, speeds up jobs, and makes training easier.
The trade-off is that standardisation can limit flexibility for unusual lifts.
That’s fine—as long as the exception process is clear and doesn’t rely on guesswork.
A simple 7–14 day first-actions plan to improve lifting accessory selection
This is a practical starting plan for a site, workshop, or warehouse that wants fewer surprises without launching a massive program.
Days 1–2: Map the “real” lifts
List the 10–20 most common lifts and note what’s routinely awkward: clearance, edge damage, shifting loads, missing lifting points, or last-minute substitutions.
If the same two lifts keep causing friction, prioritise them first.
Days 3–4: Create a one-page selection checklist
Keep it short and usable:
- Load type and surface (sharp edges? painted? hot?)
- Lifting point type and orientation, including any secure tie-down attachment points you’re relying on
- Space constraints and connection clearance
- Preferred sling types and protection
- Required markings/traceability
- Storage and inspection expectations
When the team agrees on what to standardise, keep one reference list of approved items and specs (for example, Conveying & Hoisting Solutions accessory range) so purchasing isn’t guessing under pressure.
Days 5–7: Standardise “default kits” for common jobs
Build two or three default accessory kits that match the most frequent lifts.
Label them clearly and store them where they’re used, not where they’re “meant” to be stored.
If a kit is missing items, treat it as incomplete rather than letting it become a scavenger hunt.
Days 8–10: Tighten inspection and storage routines
Pick one storage method and make it consistent.
Separate slings from sharp hardware, keep tags readable, and create a simple quarantine spot for suspect gear.
Make it easy to do the right thing quickly.
Days 11–14: Lock in procurement rules for substitutions
This is where many systems fail.
Write a simple rule: if an accessory is substituted, it needs a competent sign-off before it becomes “standard”.
It sounds bureaucratic, but it prevents gradual drift into uncontrolled variation.
Operator Experience Moment
On busy sites, the difference between a calm lift and a stressful one often comes down to whether the connector seats cleanly and the sling sits where it’s meant to.
When accessories are mismatched, people tend to “make it work” with awkward angles and extra handling, and that’s when time disappears.
The smoothest operations I’ve seen aren’t the ones with the fanciest gear—they’re the ones where selection and storage are predictable.
Local SMB Mini-Walkthrough: Sydney example
A small fabrication shop in Sydney starts doing more onsite installs and suddenly needs to lift awkward frames weekly.
They already have a mixed box of old slings and assorted shackles.
The first step is listing the top five lifts and checking where the frames are actually being picked.
Next is choosing one or two standard rigging setups that suit those lifts and won’t chew up finished surfaces.
They add edge protection and a simple storage rack so slings aren’t rubbing against sharp hardware.
They set a rule that any substitute item gets checked before use and doesn’t quietly become the new default.
Practical Opinions
Standardise a small set of “default” lifting setups before expanding the range.
Spend effort on storage, tagging, and substitution rules—this is where reliability is won.
If a lift feels fiddly, treat that as a design input, not a training problem.
Key Takeaways
- Choosing lifting accessories is mostly about matching real lift geometry and attachment conditions—not just WLL.
- Small “close enough” substitutions create most delays and risk over time.
- A short checklist plus standard kits reduces improvisation and procurement guesswork.
- Inspection, storage, and traceability often matter as much as the hardware choice.
Common questions we get from Aussie business owners
Q1) How do we reduce “random gear” turning up on site?
Usually, it starts with standardising two or three common setups and writing a simple substitution rule. A practical next step is to create a one-page approved-items list that purchasing uses for repeat orders. In Sydney, this matters because last-minute job changes and traffic delays can push teams to grab whatever is nearby.
Q2) Do we need to replace everything if we can’t confirm the history of older accessories?
It depends on what’s missing—sometimes you can quarantine uncertain items and rebuild a verified pool over a few weeks. A practical next step is to set up a quarantine spot and run a focused clean-up of the most-used gear first. In most Aussie workshops, the biggest win is removing “mystery” items from circulation so they don’t quietly become defaults.
Q3) What’s the simplest way to stop sling damage from sharp edges?
In most cases, the fastest improvement is making edge protection part of the default kit for common lifts. A practical next step is to identify the two lifts that damage slings most and introduce protection as a non-optional step for those jobs. In industrial areas around Sydney, mixed work (fabrication, installs, warehousing) often means edges and abrasion show up unexpectedly.
Q4) Who should approve substitutions when the right accessory isn’t available?
Usually, a nominated competent person (or the role responsible for lift planning on the job) should sign off substitutions before use. A practical next step is to define that role in writing and make it part of the job’s pre-lift routine. In most cases, this prevents “temporary” fixes becoming permanent habits across different crews and sites.

Why the Air Freight Forwarding Market Is Becoming Critical for Time-Se...

Buy Moissanite Rings Online for Meaningful Style and Lasting Sparkle
Choosing a ring is a personal decision. Whether it marks an engagement, anniversary, weddi...


Why Is Dubai Yacht Experience Drawing So Much Attention?
Quick Answer: Why Is Everyone Talking About Dubai Yacht Experiences?

خدمات فني صحي الخيران للمنازل والفلل
إذا كنت تبحث عن الجودة والاحترافية والسرعة في تنفيذ أعمال السباكة، فإن الاستعانة بـ فني صح...