What the Copper Pipe Fitting Process Involves and How to Prepare Your Home
Installing or replacing copper pipes involves more than just joining metal tubes. The process includes precise measurement, preparation, and thermal sealing to ensure a strong, leak-free system
Copper pipe fittings remain one of the most dependable methods for residential water supply systems. Known for their strength and resistance to corrosion, copper pipes are widely used in both new construction and renovation projects.
This article explains the copper pipe fitting process in clear steps and outlines how homeowners can prepare their space to support a clean, efficient installation. Whether you're replacing old galvanized lines or installing new pipework, understanding this process gives you more control over your home improvement decisions.
Understanding the Copper Pipe Fitting ProcessInstalling or replacing copper pipes involves more than just joining metal tubes. The process includes precise measurement, preparation, and thermal sealing to ensure a strong, leak-free system.
Initial Assessment and System LayoutEvery project begins with a thorough evaluation of the plumbing system. The plumber identifies where fittings are needed, measures pipe routes, and inspects the condition of any existing lines. Older materials, like galvanized steel or deteriorating PVC, may require complete replacement to comply with code or to ensure compatibility with copper.
This early stage often includes testing water pressure, checking for corrosion inside existing pipes, and planning access points in walls or floors.
Measuring, Cutting, and Cleaning PipesOnce the layout is determined, copper pipes are cut to the necessary lengths using a rotary pipe cutter. The ends are then deburred using a reaming tool, which smooths sharp edges and helps maintain proper water flow.
The pipe and fitting surfaces must be cleaned to a shine with emery cloth or a wire brush. This step is essential before soldering copper pipes, as any residue or oxidation can compromise the strength of the joint.
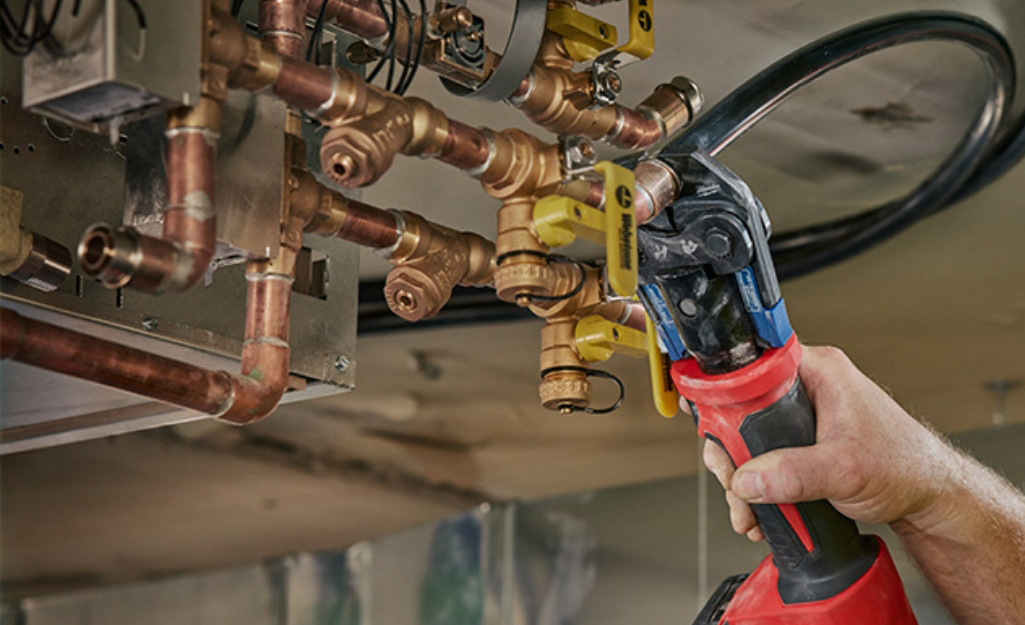
Fitting and AlignmentPlumbers first assemble the pipes without solder to check for proper alignment, length, and joint placement. This “dry fit” stage allows for adjustments before any permanent connections are made.
Fittings—whether elbows, tees, or couplings—are aligned to maintain flow direction and pressure. Proper pipe fitting preparation ensures the finished layout supports long-term use without unnecessary stress on joints.
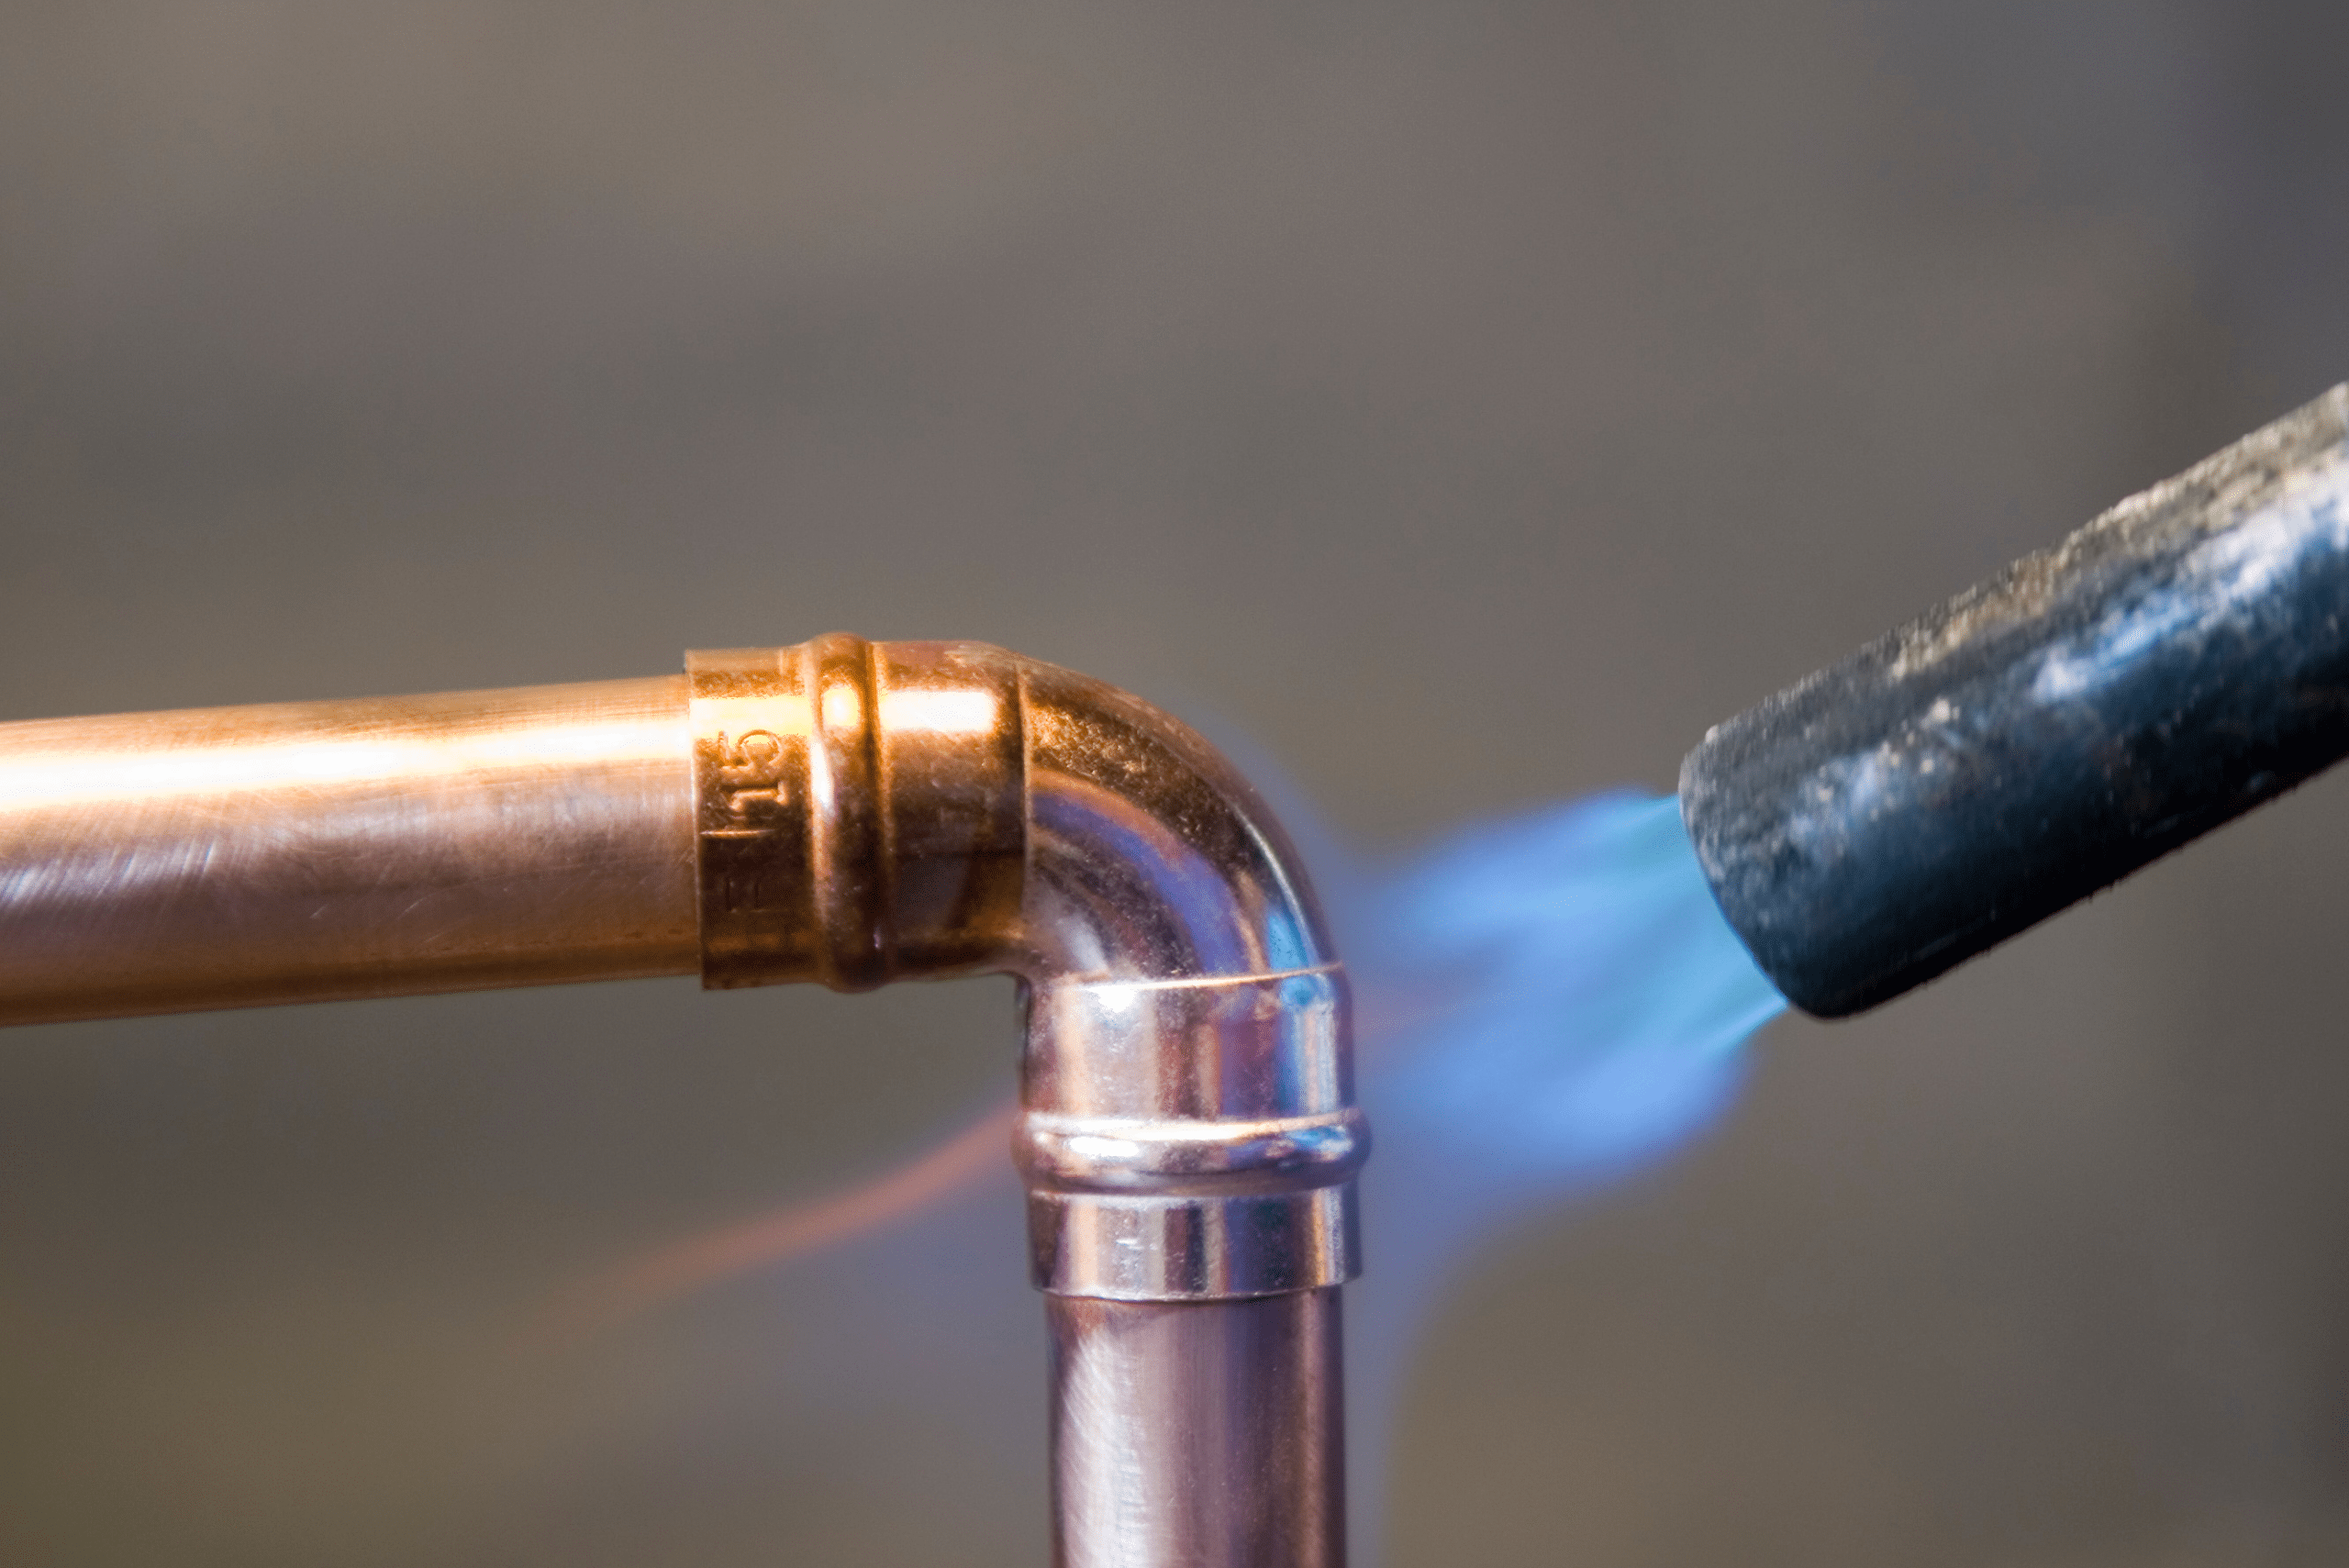
Soldering the JointsAfter confirming the layout, the plumber applies flux to both the pipe and fitting surfaces. A propane or MAPP gas torch is then used to heat the joint evenly. As the metal reaches the proper temperature, solder is applied to the edge, where it is drawn into the seam by capillary action.
This process, known as sweat fitting copper pipes, creates a solid, water-tight seal. Once cooled, joints are inspected and pressure-tested to confirm they are leak-free.
Preparing Your Home for Copper Pipe Fitting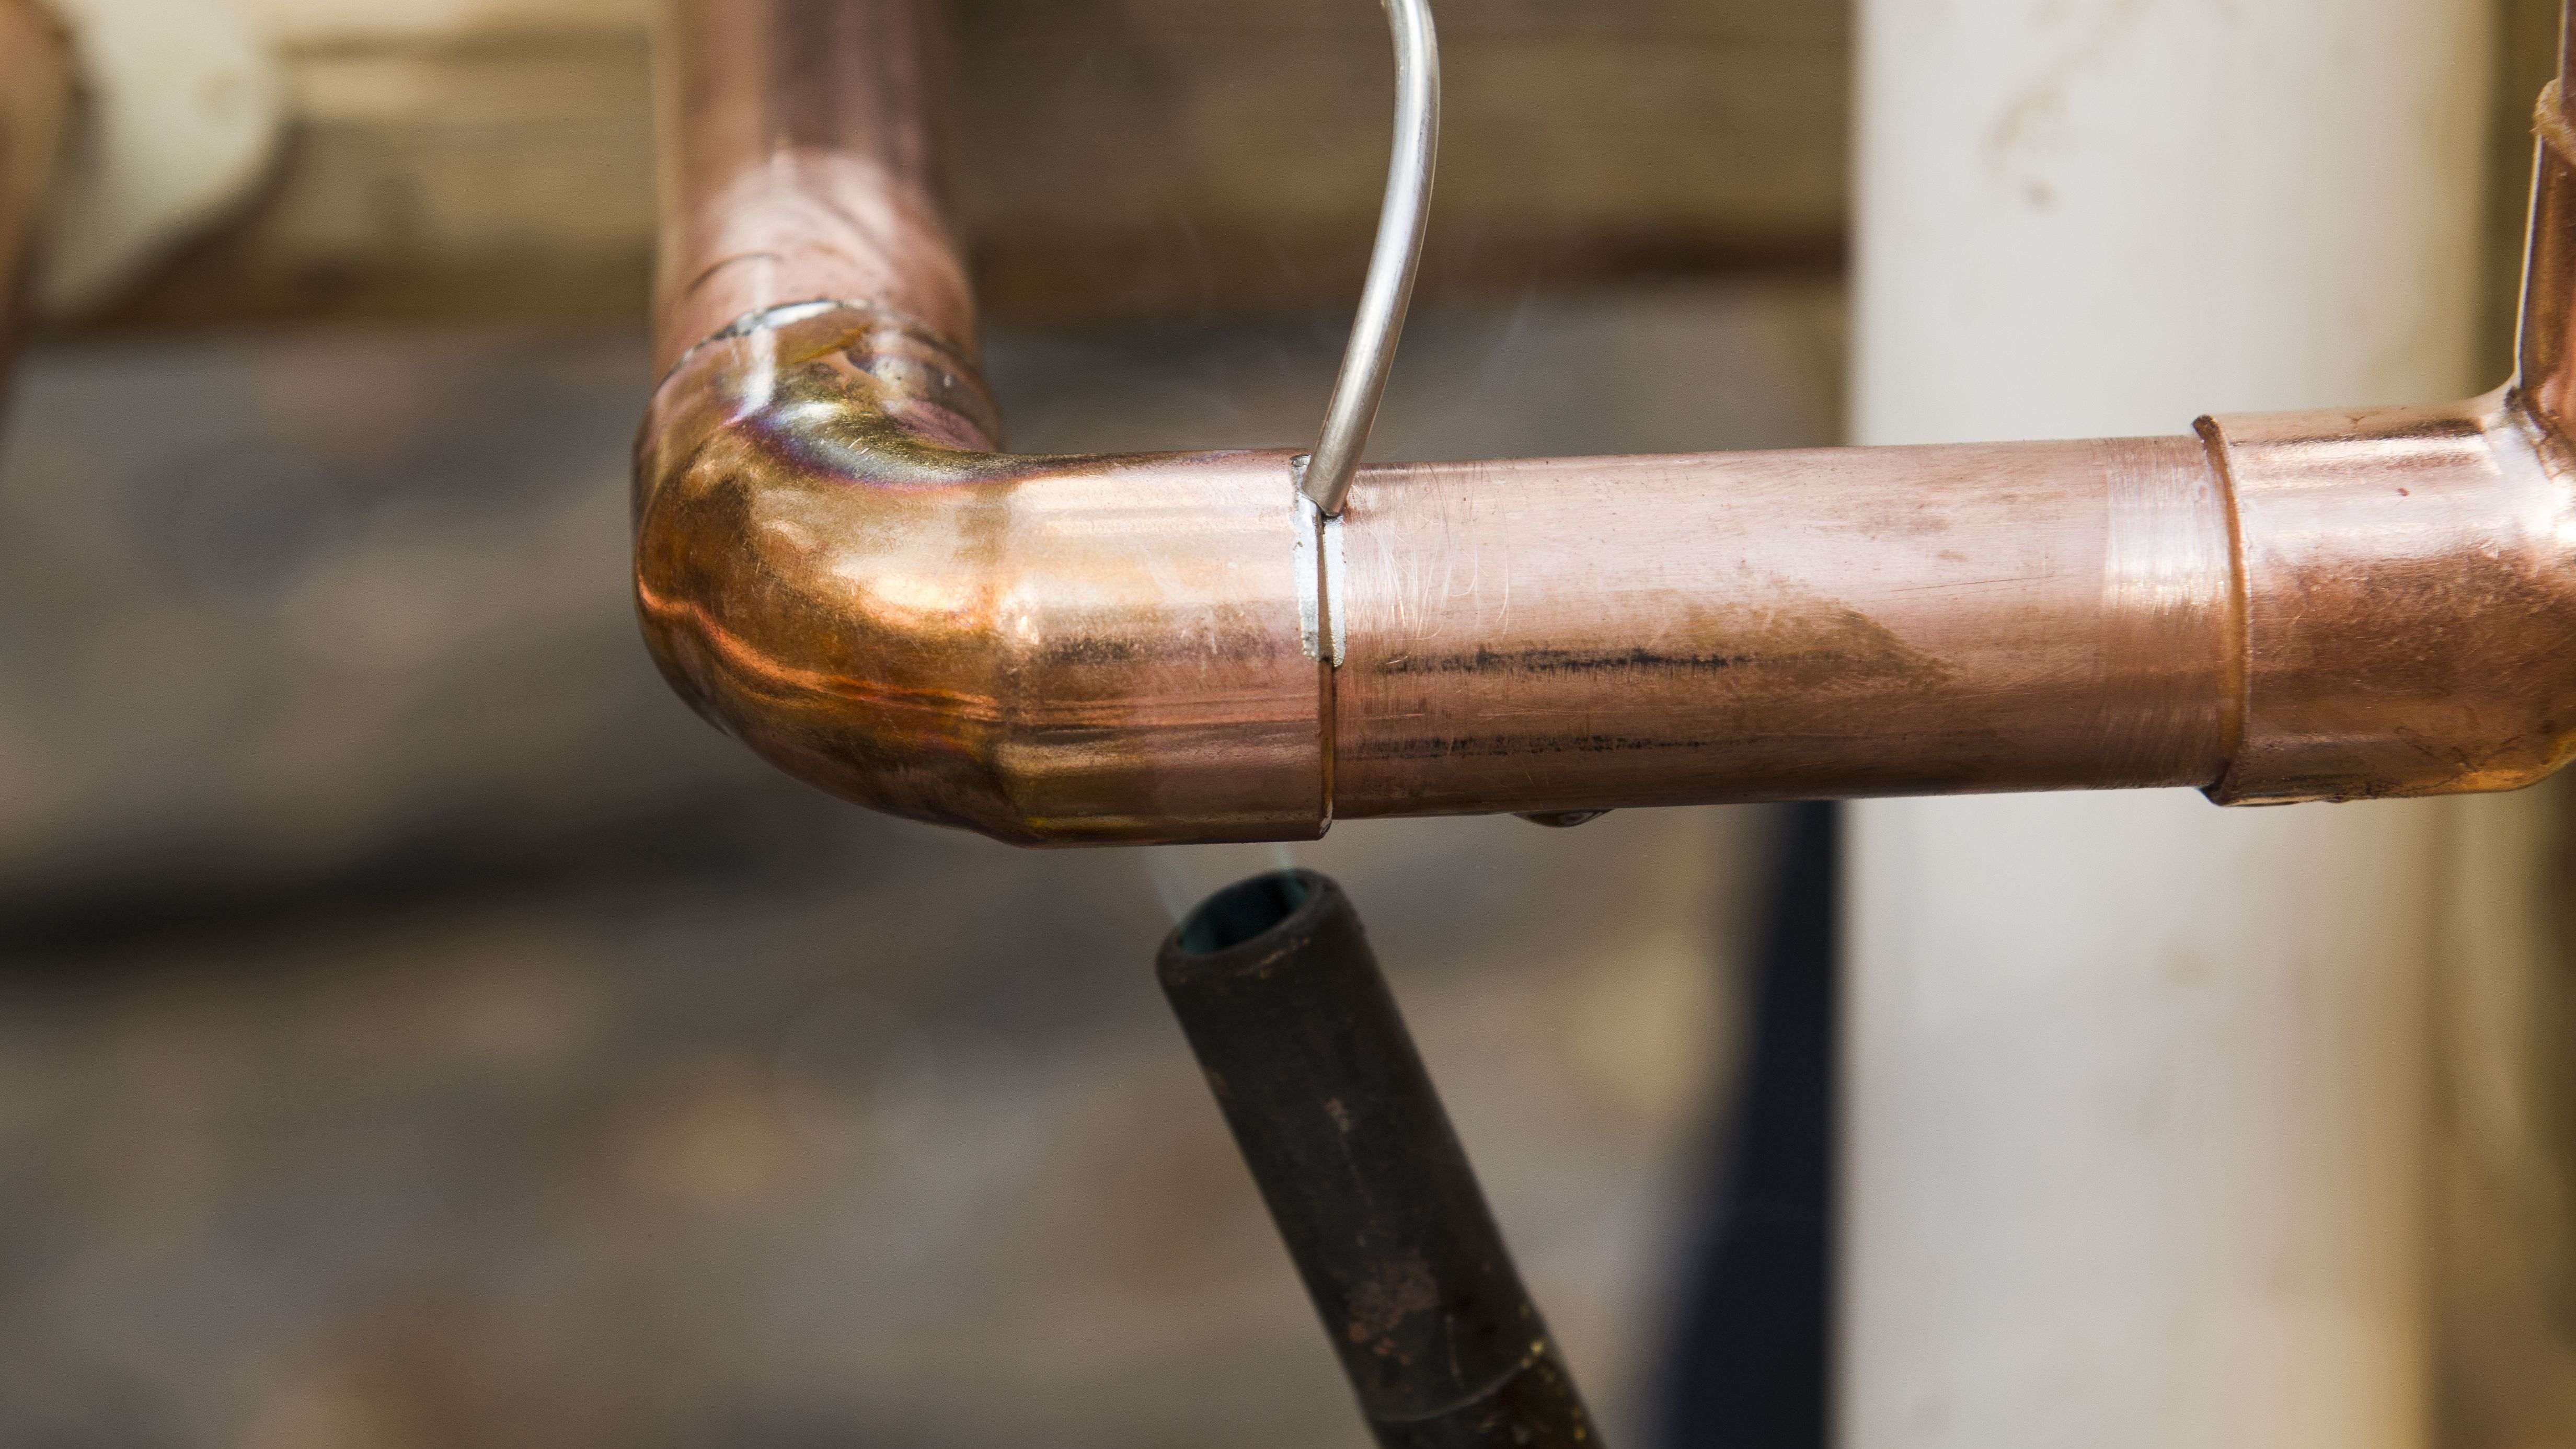
A smooth installation depends not only on technical skills but also on how well the home is prepared ahead of time. There are a few key areas homeowners should focus on.
Clear Work Zones and Plumbing AccessPlumbers often need access to multiple points throughout the home, including behind walls, inside ceilings, and beneath floors. It’s important to clear these areas beforehand.
Move furniture, stored items, or breakables away from the workspace. Protect surfaces by laying down drop cloths. If access is needed through drywall, expect some cutting and minor patching afterward.
Plan for Temporary Water Shut-OffCopper pipe installation usually requires water to be turned off at the main valve. Depending on the size of the project, this interruption may last several hours.
Homeowners should fill sinks or buckets in advance for essential use and let everyone in the home know about the timing. In some cases, particularly for larger jobs, alternative toilet and washing options may be helpful.
Identify Your Existing Plumbing MaterialsKnowing what your current plumbing system is made of can help you plan better. The table below summarizes some common materials and how they affect a switch to copper:
Understanding your starting point helps the plumber estimate time and costs more accurately.
Factors That Affect the Quality of Copper FittingsEven with good materials, improper technique or shortcuts can lead to early failure. Being aware of these risks helps you evaluate the work as it happens.
Poor Cleaning or Surface PrepSolders won’t properly adhere to dirty or oxidized surfaces. If the pipe or fitting isn't cleaned thoroughly, the joint may develop slow leaks or burst under pressure.
Watch for clean, shiny surfaces before flux is applied. This step should never be rushed, even during larger jobs.
Incorrect Solder or FluxOnly lead-free solder is safe for copper plumbing installation in potable water systems. Using electrical-grade solder can create health risks and may violate local plumbing codes.
Flux also needs to be applied correctly and in the right amount. Too little won’t help the solder flow, while too much can cause blockages or corrosion inside the pipe.
Incomplete Drainage Before SolderingResidual water in the pipe cools the joint too quickly during soldering. This can prevent the solder from sealing fully. Pipes must be completely drained and often dried using a towel or compressed air.
This is one reason soldering is rarely done in active systems without full water shutoff and drainage first.
For a basic residential installation, copper pipe fitting usually takes 4 to 8 hours. Larger or more complex projects may take longer depending on access and pipe routing.
Can copper pipes be joined to PEX or PVC?Yes. A plumber uses special transition fittings or dielectric unions to connect copper pipe connections to other materials while preventing corrosion.
Is copper still the best material for home plumbing?Copper is highly durable, heat-resistant, and safe for drinking water. While PEX is less expensive and easier to install, many professionals prefer residential copper piping for its lifespan and proven reliability.
What maintenance do copper pipes need?Copper pipes require minimal maintenance. Keep water pH balanced and avoid excessive movement at joints. Annual pipe joint inspection helps catch any early wear or leaks.
ConclusionThe copper pipe fitting process combines precise planning, physical skill, and knowledge of building systems. From the initial measurements to the final soldered joint, each step must be completed correctly to ensure safe, long-term plumbing.
Homeowners can make the job easier by preparing clear access routes, knowing their current plumbing setup, and planning for water shutoffs. A well-executed installation using copper helps prevent future problems and increases the value of the home.
FAQsCan I reuse old copper pipes during an upgrade?
Only if the pipes are in good condition and free from corrosion or damage. Most professionals recommend replacing any aged or thin-walled copper to avoid future issues.
Do copper pipes affect water taste?
Copper may cause a slight metallic taste if pipes are newly installed, but this usually fades after a few weeks. If it continues, a water quality test may help.
What temperature can copper pipes handle?
Copper pipes can withstand temperatures up to 400°F, far above typical residential hot water levels. This makes them ideal for both hot and cold water systems.
How long do copper pipe joints last?
When properly soldered, copper joints can last 50 years or more. Regular inspection of older systems helps catch any signs of wear or corrosion.
Is a permit required for copper pipe installation?
In most areas, yes. Any significant plumbing upgrade—including home plumbing upgrades involving copper—requires a local permit and final inspection.
Reviewer: Chloe Martinez brings 8 years of experience in home improvement. Feedback from Chloe helped shape this post to better support companies working to strengthen their reputation and expand their reach.