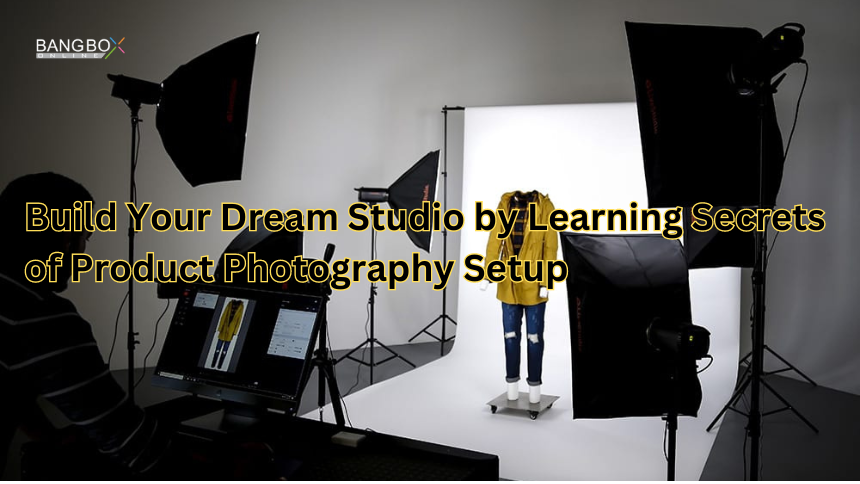
Build Your Dream Studio by Learning Secrets of Product Photography Setup
"Elevate your product marketing with expert product photography setup tips. Learn how to create stunning visuals, whether at home or in a small studio. Boost sales and captivate your audience with professional product images."
2023-10-01 12:26:46 - Tooba Naveed
Product photography setup plays a fundamental role in marketing or business for the promotion of a product. Photography is a skill that illuminates the creative side of an individual. The perception of an individual varies as each human being possesses distinct qualities. The style of capturing and showcasing a product and putting it behind bars can boost marketing efficiency. The setup for product photography must be devised wisely according to the needs of a specific product.
How to Set Up a Photo Studio for Product Shots:
It’s crucial to set up a photo studio with proper planning for the promotion of your product. If you are a beginner and want to do marketing of your product. Here, are a few points on how to set up a studio:
Select a Space:
Select a space that is large enough in which your equipment, background, and product settle well. Provide ample light to the space.
Background Setting:
Use your aesthetic sense to decorate your background. Choose any white, grey, or colorful color background depending on your product. Add props if it’s important for product promotion but keep it trendy and minimal.
Lighting Equipment:
Investing in different lighting setups is important for gaining the desired look of your product. Proper strategy is necessary to maintain the beauty of the product.
- Softboxes are important to reduce harsh shadows of light and create soft illumination by diffusing light.
- Light stands and clamps for proper positioning of light.
- Reflectors reduce shadows by bouncing light.
Camera and Lens:
Try DSLR or mirrorless cameras by doing manual settings for full control. Choose a lens (a macro lens for close-ups and to capture general products using a standard lens).
Tripod:
In the realm of product photography, Tripod is crucial to hamper the camera shake and maintain sharp image quality.
Product Placement:
Position your product on a steady and smooth surface like on an adjustable shooting table. To justify the alignment of the product, use an adjustable shooting table.
Camera Settings:
To minimize the noise, maintain your camera at low ISO, and to keep the whole product in focus, use a small aperture. Use various shutter speeds to manage the exposure.
Composition:
Apply different rules like the rule of thirds, leading lines, and other composition techniques to create captivating shots of the product. To highlight the importance of different features of the product don’t forget to pay heed to capture the product from various angles.
White Balance:
For accurate and natural results adjust the white balance of your camera.
Test Shots and Adjustments:
Capture test photographs and check them on a computer to assess them for proper focus, exposure, and composition. Make necessary improvements according to the need in lighting, camera settings, and product placement.
Post-Processing:
Use Adobe Photoshop or any other software to do final color correction, cropping, and retouching.
Consistency:
To gain a cohesive and professional look in product shots, be consistent in working on light, angles, and background.
Backup:
To minimize the loss of data do back up of your photos regularly.
Product Photography Lighting Setup:
A photograph requires proper lighting effects to enhance the quality and visibility of a product. Sunlight can be used for a more vibrant look to increase the visual appearance of a product. Adding different colors to the styling of a product can give a more aesthetic look to the setup. Different lights including studio lights, LED panels light modifiers, etc. are used to increase the lighting effects in a photography setup.
Product Photography Setup at Home:
Clicking shots at home in any free space is a time-saving and low-cost idea that is a more convenient way to accomplish the product photography task. Building a small setup at home and professionally using different equipment according to the requirements can also give a pleasing view.
DIY Product Photography Setup:
Choosing a suitable background for product photography is a task of utmost importance. DIY product photography setup is a remarkable idea by using different techniques and tools that are within one’s reach. Various objects including white sheets, whiteboards, spare colorful clothes, gadgets, and other DIY products can be helpful in DIY product photography setup.
Small Product Photography Studio for Product Shots:
A small product photography studio provides aid for different marketing organizations for their product shots. It can be a more accessible way to improve their product sales and marketing. The marketing of a product that is either featured online or published in print media, must be organized schematically that showcases the fulfillment of the demand of a buyer.
Home Studio Product Photography:
Handling a product carefully in a professional manner plays a significant role in optimizing the sale of a product. Home studio product photography allows different small businesses in a more flexible way to display their products and ensure their good performance. An individual can have a better option to make changes accordingly in a Home Studio or DIY product photography studio. A person can achieve the desired results by placing a product at the right location with some good creative and editing skills.
Photography is skill skill-intensive process; you will be able to take high-quality images if you make consistent efforts that promote your product well.
