
Basement Walls Without the Rework: How to Use Panels in Modern Construction
Basement wall panels can speed up modern builds and improve consistency, but long-term performance depends on a clear water plan, tight joint and penetration detailing, and strict sequencing—especially verifying waterproofing, protection, and drainage discharge before backfill.
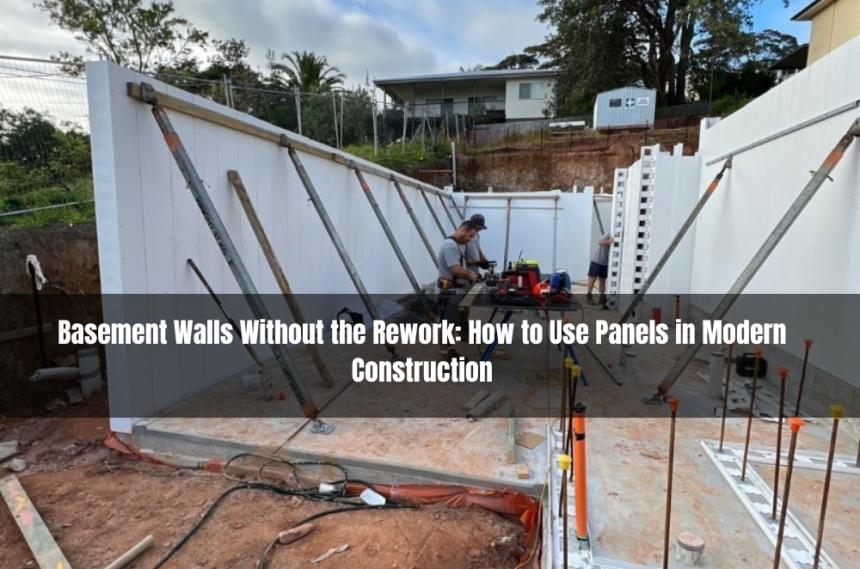
Basements are where modern construction schedules go to die when water control, sequencing, and tolerances aren’t treated as one system.
If you’re evaluating basement wall panels for modern construction, the real win is repeatability: faster wall builds, fewer site-made variables, and clearer inspection hold points, as long as drainage and waterproofing are designed to match the panel joints and interfaces.
This guide explains what to prioritise, what commonly goes wrong, and how to set up a panel-based basement wall so it stays dry, straight, and low-maintenance across projects in Australia and the United States.
What “modern construction” changes about basements
Modern delivery models reward predictable outcomes more than “heroic” site problem-solving.
Panelised approaches can reduce labour intensity, compress critical path time, and improve straightness and finish consistency when done with disciplined detailing.
The trade-off is that joints, penetrations, and transitions become the main risk zones, so the project needs a joint-and-water strategy from day one.
If the wall system is chosen before the water system is defined, the basement often becomes a long-term management task instead of a completed asset.
What basement wall panels must do in the real world
A basement wall is a retaining structure, a moisture barrier interface, and a tolerance-controlled assembly all at once.
In practical terms, the wall system needs to:
- resist lateral earth and surcharge loads without drifting out of plumb
- manage hydrostatic pressure by preventing water build-up behind the wall
- maintain continuity at joints, corners, and penetrations
- integrate cleanly with the slab/base interface and top termination
- survive wet/dry cycles, soil movement, and temperature swings without opening leak paths
Panels can make geometry and installation more consistent, but they do not remove the need for proper drainage and waterproofing discipline.
Start with the “water story” before you lock the wall system
Most basement issues start with an incomplete answer to one question: Where does water go during heavy rain and prolonged wet conditions?
Before you finalise panels, document:
- surface runoff direction and where it concentrates
- likely subsoil conditions (clay, fill, perched water) and seasonal behaviour
- the drainage pathway (collection → conveyance → discharge)
- how discharge remains functional when debris, silt, or peak rainfall occurs
- how top termination prevents water tracking behind the membrane
A panel system installed perfectly can still leak if the drainage pathway is unreliable.
Joints and interfaces are the difference between “fast” and “fix forever”
Basement leaks rarely appear mid-wall; they appear where components meet.
Treat these as engineered details with drawings and responsibilities, not site improvisations:
- panel-to-panel joints
- corner returns and changes in direction
- wall-to-slab interface
- service penetrations and sleeves
- top termination and transition to above-grade finishes
A modern basement is “won” in detailing and sequence, not in concrete volume.
Common mistakes that create leaks, delays, and callbacks
These are the patterns that repeatedly turn basements into schedule and warranty pain.
- Selecting panels for speed but leaving joint strategy vague until install week
- Relying on waterproofing alone instead of combining it with effective drainage relief
- Allowing late penetrations that force cutting, patching, and inconsistent membrane repairs
- Backfilling before waterproofing has cured, protection is installed, and drainage discharge is verified
- Skipping protection boards or using inadequate protection where backfill contains sharp aggregate
- Underestimating how corners and terminations behave under movement and water pressure
- Treating inspection as a paperwork step instead of a physical “hold point” with sign-off
If excavation is required to fix an issue later, the original “time saving” disappears instantly.
Decision factors when choosing a panel approach
Panels can be a great fit, but only when the project conditions support consistent execution.
Consider these decision factors:
- Water risk level: uphill catchments, clay soils, and poor discharge points demand stronger drainage design regardless of wall type
- Penetration complexity: more services increase the value of pre-planned sleeves and standardised detailing
- Access and staging: can crews install waterproofing, protection, and drains cleanly before backfill, with room for inspection?
- Tolerance expectations: panel systems shine when straightness and repeatability matter across multiple walls or builds
- Crew familiarity: new systems need clear installation steps and supervision until the process becomes routine
- Quality gates: the more you can define “stop points,” the less you rely on memory and good intentions
A panel system is only as modern as the sequence that protects it.
Operator Experience Moment
The most reliable basements I’ve seen are the ones where “pre-backfill sign-off” is treated like a hard contractual gate, not a courtesy check.
When the team verifies joint completion, membrane continuity, protection installation, and drain discharge before any soil goes back in, the basement stays boring for years.
When backfill happens early to tidy the site or keep machines moving, problems get buried, then reappear as leaks, efflorescence, and finishing failures later.
A simple first-action plan for the next 7–14 days
Days 1–2: Write the water plan in plain language
Map surface runoff, identify subsoil risk indicators, and document discharge points with a “what if it’s blocked?” scenario.
Days 3–4: Lock joint and penetration strategy
Confirm joint sealing/waterstop approach, finalise all penetration locations and sleeves, and assign one person to control late changes.
Days 5–6: Build the sequence and hold points
Create a short sequence that includes cure times, membrane installation, protection, drain installation, and a mandatory inspection hold before backfill.
Days 7–10: Create a one-page basement checklist
Include substrate readiness, joint prep, membrane continuity checks, corner detailing checks, penetration sealing steps, protection board coverage, drain placement, and discharge verification.
Days 11–14: Run a mock “pre-backfill” review
Walk the crew through the hold point process and define stop rules (what triggers rework before backfill is allowed).
One page of discipline usually beats ten pages of spec nobody follows under pressure.
Local SMB mini-walkthrough: a small contractor standardising basement delivery
A small contractor is delivering basements on mixed soil sites and wants fewer surprises.
They standardise one panel layout and one joint-detail method across jobs.
They require all penetrations to be scheduled before panels arrive on site.
They add a protection board as a non-negotiable item before any backfill.
They test the drain discharge and document it with photos and a sign-off.
They track defects across three jobs and update the checklist so mistakes don’t repeat.
Practical Opinions
If the drainage pathway isn’t clear, the basement isn’t ready to be built.
Backfill is a quality gate, not a scheduling activity.
Late penetrations are the fastest way to “design in” future leaks.
Key Takeaways
- Panel systems improve repeatability, but they don’t replace drainage and waterproofing discipline.
- Most failures start at joints, penetrations, corners, and slab interfaces; detail these early and consistently.
- Use inspection hold points, especially pre-backfill, to avoid burying defects.
- Standardised checklists and penetration control reduce rework across multiple projects.
Common questions we hear from Australian businessesDo basement wall panels automatically reduce leak risk?
Usually, they reduce variability in wall geometry, but leak risk depends on how joints, penetrations, and waterproofing continuity are detailed and executed.
Next step: require a documented joint-and-penetration detail pack and make it part of the installation checklist.
Local note: In many Australian sites with clay or perched water, drainage relief is the main driver of long-term dryness.
When is it safe to backfill around a panelised basement wall?
In most cases, only after waterproofing has cured, protection is installed, and the drainage system is proven to discharge under realistic conditions.
Next step: implement a pre-backfill sign-off that includes photos of joints, terminations, protection coverage, and the drain outlet condition.
Local note: Australian storm bursts can expose weak discharge points quickly, so verify “where water goes” before burying the system.
How do we manage service penetrations without creating future leak paths?
It depends on whether penetrations are planned early and standardised, or added late and patched inconsistently.
Next step: lock a penetration schedule (location, size, sleeve type) before panel install and enforce a “no late cut-ins” rule unless formally reviewed.
Local note: multi-trade timelines on Australian sites make late changes common, so assign one owner to control and verify penetrations.
Are panels always faster than site-formed basement walls?
Usually, they’re faster on the wall erection side, but total programme speed depends on waterproofing, protection, drainage, inspections, and backfill sequencing.
Next step: compare approaches by mapping the full critical path (including hold points), not just the wall build duration.
Local note: weather windows and labour availability can swing the real programme, so build in sequence buffers rather than assuming speed will “just happen.”

From Mines to Mega Projects: The Strategic Growth of the Global OTR Ti...
The Global OTR Tires Market is witnessing significant growth driven by rising demand from...
Download QuickBooks Desktop for Mac: Complete Installation and Setup G...
Download QuickBooks Desktop for Mac easily with our complete setup guide. Learn installati...
Which institute offers the best Data Science Online Training in India...
Among the institutes offering industry-oriented training, BismilSoft is widely recognized...